Yes, while PC modded cases are more popular than ever, there are a few that fit right into the theme of certain fabulous blogs. Introduce the Sega CD PC. This project was actually completed in 2004 and posted on a great site full of PC case mods called, "
mini-itx.com." I found this link in Joe Grand's book
Game Console Hacking, which is slightly outdated but extremely informative and a good source for brain storms. Check it out!
Introduction
After seeing all the great mini-ITX projects I was tempted to make one of my old 8-bit computers into a PC, but not being able to use the original keyboard was somewhat of a disappointment. Also I would have to invest in a laptop CDROM and a small HD in order to cram it all in. What I wanted was a mini-ITX project that would cost me as little as possible using parts I had from other PC's. Then while putting Christmas decorations away in the basement I noticed the old SEGA CD box I used to store old computer parts and voila I had my next project!
The motherboard I chose was the EPIA M10000 Nehemiah core 1GHz with CLE266 North Bridge. For parts I already had a stick of 256MB DDR, a DVD ROM, and an old 10 Gig HD. Everything else is built in to the MB. All I purchased was the MB, a power supply, and some buttons.
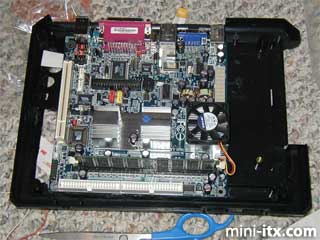
The original SEGA CD system was perfect for my project. The CD case is very tall and the original Genesis sits on top. After gutting the insides of both cases, saving the parts for nostalgia sake, I test fit a DVD and HD to see what configurations were possible. I hadn't yet purchased the MB so I wasn't sure how high it was.
My first arrangement looked something like this:
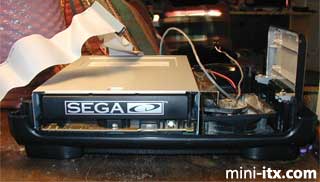
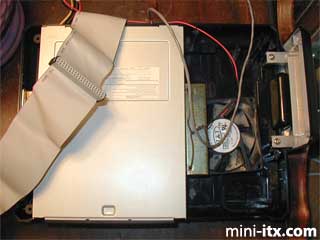
You can see at this point the right side of the CD case contains just a fan (not tied down). Notice I was able to save the SEGA CD face and with minimal trim fit it to the DVD.
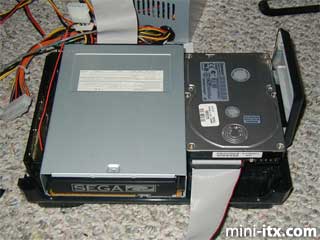
I used metal HD mounts on the sides of the DVD as horizontal spacers and my tie down of choice, bailing wire, to fasten the drive to the bottom of the case :) The DVD barely fits in the CD case. The SEGA CD is actually smaller than a standard CD drive. I had to try several IDE cables to find one that was thin enough, and I had to cut off about an eighth if an inch of the top of the power cable so the wires would bend around. You can see the plastic piece still hanging on the wires.
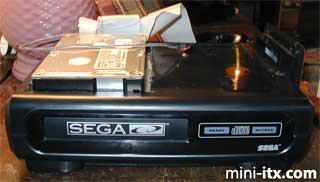
I cut a hole through the top of the CD case and in to the bottom of the Genesis case big enough to fit the HD on top (Don't do this! Read more later).
Here you can see the HD barely sticking up through the bottom along with the cables from below.
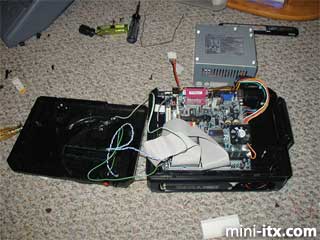
Once the MB arrived I immediately realized it wouldn't fit in the Genesis case with the HD sticking through, so don't try doing this. Just cut a small hole in the two cases to let the power and cables stick through. Having a big hole made it hard to mount the MB.
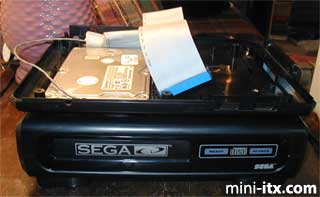
Here is plan B with the HD next to the DVD. Believe it or not I used Legos as spacers to raise the DVD up. The left side of the DVD still has a metal HD mount attached as a horizontal spacer, but the mount on the right side of the DVD is now screwed into the lower 2 holes as a riser for the HD. To cut down on vibration and to fasten it I used double faced thermal tape.
I wanted to use the SEGA power switch and volume control on top but that didn't work out. There wasn't enough vertical clearance with all the buttons hanging down so I had to cut off the bottoms (notice lots of black plastic chunks lying on the floor). On the back I put nice buttons to turn the system ON/OFF and Reset. I used front panel connectors I had from an old PC and wired them to the new switches, and I also replaced the Power ON LED.
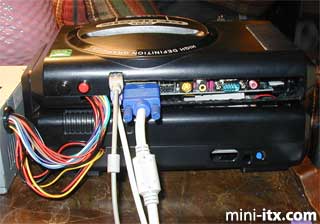
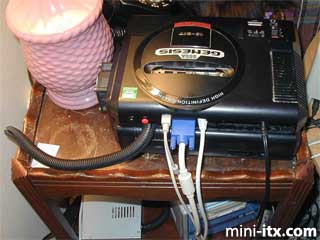
On the back I really didn't want to cut out so much plastic, and using the nice face plate was out of the question with the curved back of the SEGA case, so I only cut out enough space to fit the cables I was most likely to use. With a minimal cut I can access everything except the printer port which I doubt I'll ever use. I may also have to cut out a little more on the right side to reach the top audio connector. The power and reset buttons can be seen here and the big ugly internal power supply cables going into the top and bottom. I have looked into replacing those with one cable from a nice external supply but from what I have read the external supplies don't have enough watts for full size CD or DVD drives.
I made a "cable" out of three old power cables. I cut the ends off each cable then wired the ends to a 12 position barrier strip. A tip if you're doing this at home, make sure all three power cords are cut to the same length or you'll have to unwire, cut, and rewire it, and make sure the cables aren't twisted all around each other. I'm not opening the case again to get pictures, it's too packed, so I will describe what I did. I looked at the power connector on the motherboard and mapped out the wire colors and did some research on the web about ATX power cables. There are basically 9 different wires, +3v, +5v, +12v, -5v, -12v, Ground, and 3 wires that remotely turn the power supply on/off from the button on the front of your PC.
Inside the three power cords are 3 wires. I labelled each power cord A, B, and C, and wired them to the left side of a barrier strip. Then I cut all the power cords to the PC and wired in only one of each color wire, red, orange, yellow, black, white, green, gray, blue, and purple to the right side of the strip. The other end of the power cords I wired in the same order as the first strip to a second strip, so labeling your cables is important. And this is were it gets tricky. There are about 10 black wires, 8 orange, etc. that need wired into the corresponding strips to match those on the power supply end. You can get at most 3 or 4 wires wrapped together to fit in a strip, so I had to be creative which is why I chose a 12 position strip. There are 3 unused connections. Black and orange are the most common wires so I "jumpered" two of the extra connections to black by running wires between them, and the other connection I wired to orange. Then I divided up the black and orange wires into groups of 3 or 4 and wrapped and wired them into the left and right sides of the strip. The rest of the colors only had 1 or 2 to connect and were much easier. I also cut and wired in the two IDE power cables. Then used tie downs to hold that mess down to the case.
On the power supply end there were even more wires, but since I was only using one of each color wire the rest were unused. I cut all of them off and covered the ends with electrical tape to avoid contact. Then I was left with the three cables. I bought a plastic tube from Radio Shack which is split down the center. Simply shove the cables down in the tube from one end to the other. Then I made the hole in the SEGA case bigger to fit the power tube. And finally I opened up the power supply and put the strip, the tapped off wires, and the end of the power tube inside and sealed it back up. Now it looks nice and professional. ;)
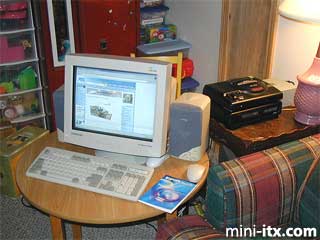
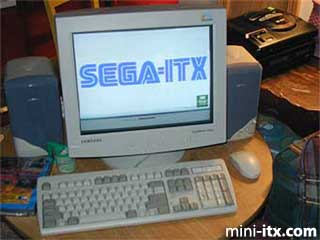
Here is the SEGA-ITX surfing the web at the VIA site. Thank you VIA! At this time I have no plans for a floppy drive. I installed everything from CD boot disks I made.
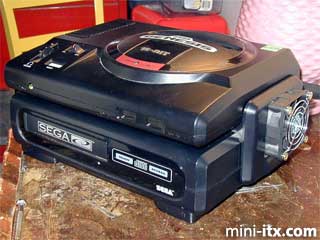
I added a fan to the side of the system since there's not much room for air circulation. It looks rather large from this angle but its really just a cpu fan. I may get a thinner one so it doesn't stick out so far. It's a little on the loud side so I used the trick of wiring it from the +12v to +5v and make it run at about +7v. Truthfully from what I've seen the system never gets hotter than "warm", unless you're running the dvd a lot, so I doubt you really need an external fan. The yellow HD activity LED I decided to wire into the hole marked for headphones on the front, and I taped off the gamepad connector holes. In order to reach the DVD drawer open button I had to drill a small hole in the face plate. I hated having to do that, but that's the only way you can open it from DOS. I use the old Apple paper clip trick to open the drawer :)
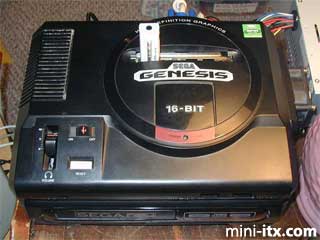
I cut down the cartridge door housing to make it fit again and put in the extra USB connections that came with the board. I had to cut off the firewire connectors because they were right up against the power connector and wouldn't fit. Here is my MuVo "cart" plugged in while I load up some mp3's. And to keep the SEGA case from sliding around on top of the CD case I used double faced tape in various places to stick it together. You can see the VIA EPIA mini-ITX sticker on the corner there :)
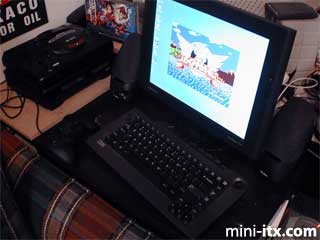
And here is the SEGA-ITX hooked up to a 15' black LCD, black cordless keyboard/mouse, black joystick, and black speakers. Looks nice in black!
-kaokensho

No comments:
Post a Comment